|
|
WoodworkingHobby.Com! Home of Hobbyist Woodworker Dennis Slabaugh
|
SIMPLE CABINET COMPONENT PRODUCTIONPANEL CROSS CUTTER
©2004 Dennis Slabaugh, Hobbyist Woodworker
We have all faced the problem of cross cutting a 24” width piece of plywood for a cabinet component. Then, we have to make both sides (or the sides of multiple cabinets) exactly the same length. We measure the length (or better yet use a permanent story stick) and mark the cut line across the sheet. But, how do we cut it cleanly, squarely and perfectly perpendicular to the edges? And if we manage to do the first one the way we want it, how do we make 10 more exactly the same length? Oh, and by the way, we want to do it without an assistant and we don’t want to take all day to do it. And finally, we may just want to make a few more of those cabinet sides next week and have to go through the complete set-up process once again. There are many ways of making a ripping or crosscutting guide for this job and there are many great commercial guides we can buy; some expensive and involved, and some simple and reasonably priced. And even if I had the room and the financial resources for a commercial panel cutter, I would really prefer to make my cuts on a flat horizontal surface rather than on a vertical plane. I have been using various lengths and widths of solid core doors (Heavy wood faced doors filled with gypsum and sheathed with a layer of hardwood on both faces and around the edges, top and bottom) for years around the shop. They are heavy (they stay in place), flat and stable. They make a great workbench top and an excellent assembly platform either on the floor or across a few horses. You can buy seconds at the lumberyard for very little money. They practically give them away when they make them to order but have a flaw in them. One of these solid core doors is the foundation of my simple panel cutter. (It actually serves double duty as an ass One of the problems with any rip guide system is supporting the panel and the cut-off portion. There are tricks to do that by using thick rigid foam underneath the panel as a buffer for the saw blade coming through the cut or using sacrificial boards underneath. I have tried them both and they can be problematic and cause blade deflection (especially with the thin kerf finish blade that I use). The other problem with these aids are that they have to be replaced and kept from moving around. Also there is the “repeatability” issue as well. For me, there is nothing better than a fixed cutting line and having the material butt up against a fixed stop at the proper length for repeatability.
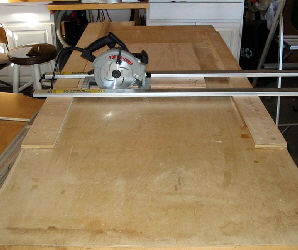
Bring on the solid core 36” wide door and suspend it between two solid sawhorses. Its shear weight will keep it in place for this operation. To prepare the panel cutter, the first order of business is to rout a perpendicular groove about ½ inch below the surface of the door face (across the plywood strips) to create a clearance channel for the circular saw blade. Use a ½ inch straight cutting bit. Locate this groove about 48 inches from one end of the platform.This is the real value of this system. You don’t have to worry about cutting into sacrificial boards or foam and your cutoff piece of wood is fully supported through out the cut. Next mill two strips of plywood ripped cleanly at about 2” wide and about 65 inches long. Cut them into two pieces at around 55”. These strips will be screwed down on the edges of the door to establish the height of the cross cut “carriage” and the reference edge for the square cut of the plywood panel. (and if you are using the “True Grip” Style clamps they will be the clamping reference edges for the guide) They should be about ¾ of the length of the door You will need to shim them ever so slightly with a strip of veneer to allow clearance under the cutting guide for the panel. Secure the longer pieces by first butting them at the bottom and top edges of the platform. ( the door is positioned length wise to your right and left when facing it) Next attach the shorter pieces on the other side of the ½” routed groove in the door. T
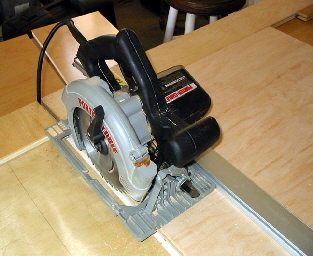
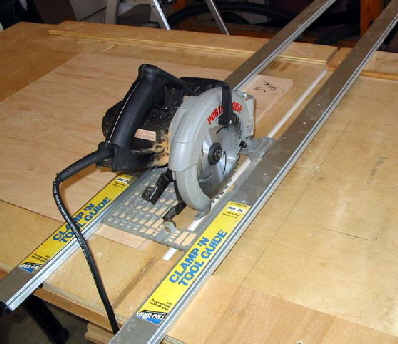
Now it is time to affix the left and optional right guide rails. You can easily use the “True Grip” brand of clamping guide or you can screw down a straight piece of hardwood or plywood. Be sure it is absolutely perpendicular to the bottom cleat to insure a square cut line. The clamp and tool guide affords much more flexibility and the ability to take the panel cutter apart or set it up in no time. Establishing the cut line with this guide system or with any other depends on the width of the soleplate of your circular saw
If you are installing a second guide rail to “capture” the sole plate of the saw, place a piece of wood on the table under the saw, just short of the cut line to support the saw base plate. Retract and hold back the blade guard so the saw sits flat with its blade extending just below the surface of the table within the routed clearance groove. Now install the second guide rail to the left butted against the right side of the sole plate parallel to the left rail.
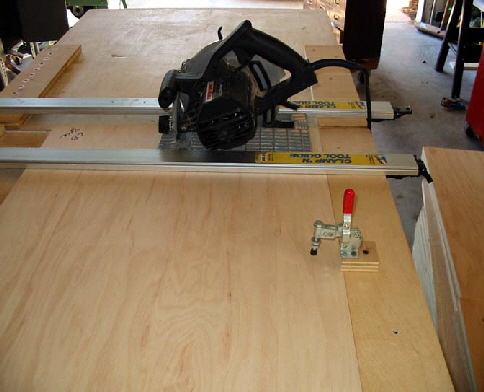
You can optionally install a toggle clamp on the lower cleat to lock the piece of stock in place while you perform the cut. Finally, you can devise a movable / removable stop at the left end of the “table” to enable consistent, accurate, and repeatable cuts especially for cabinet side panels.
Now that the panel cutter is completed, it is an easy job to slip a ripped sheet of plywood under the guide fence and slide it down to the stop. Run the saw across making the cut. Flip the stop up and take out the cut panel. For the next piece, just slide the remaining piece of panel down to the stop, and repeat the cut. You can do this one after another with consistent accuracy and no fear of your panel falling to the ground or pinching the blade. You can also be sure that all your cabinet sides will be the same length.
|
|
[Home] [About Us] [Completed Projects] [New Kitchen] [Workshop] [Information] [Insurance] [Safety] [Panel Cutter] [Face Frame Jig] [News] [FAQ] [Office Project] |


 embly table as well)
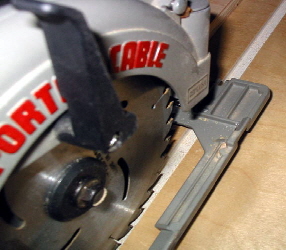
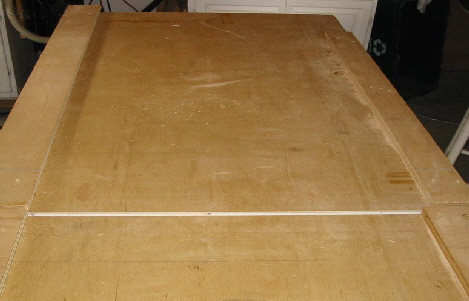 hese smaller pieces will support the use of the optional second guide rail.
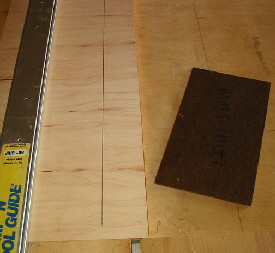 and the blade you choose to use. I use a thin kerf multi-tooth cross cutting blade. I made a dual set (two of each) of cutting guide width templates out of 1/8” masonite. This was done by affixing a length of the masonite with double sided tape against a guide fence and running the circular saw down the fence and ripping a length of the masonite to establish the width of the saw base plate and the installed blade. I used the same process on the short side of the template. When I am ripping long sheets with a straight edge, I can use one at each end of the cut line and the guide to make sure it is dead on at both the beginning and the end of the cut line.